Why Is My RV Generator Voltage Fluctuating or Dropping?
Voltage irregularities in an RV generator are often the first sign of a failing voltage regulator. When a regulator malfunctions, you might notice your lights flickering, appliances running inconsistently, or even a complete shutdown when under load. The voltage regulator is responsible for maintaining a steady output, typically between 110 and 130 volts AC for standard RVs. A faulty regulator can cause under-voltage, which risks damaging sensitive electronics, or over-voltage, which can fry batteries and inverters.
Common symptoms include erratic readings on your generator’s control panel, a humming sound from the generator head, or the generator running but producing no power. The root cause is often internal brush wear, carbon tracking on the slip rings, or a failed solid-state regulator module. Testing the voltage regulator before it fails completely can save you from being stranded without power.
What Tools Do I Need to Test My RV Generator’s Voltage Regulator?
Testing a voltage regulator is straightforward with the right gear. You will need a digital multimeter that can measure AC voltage (up to 300V) and DC voltage (up to 50V). A non-contact voltage tester is handy for safety checks, and a high-impedance multimeter ensures accurate reading on sensitive electronic circuits. For brush-type generators, you’ll need a flathead screwdriver and a small wire brush for cleaning slip rings.
If your generator is remote-start, consider pre-reading our guide on RV Generator Remote Start Installation: Step-by-Step Guide for Convenience to understand how the regulator interacts with start-stop systems. A load bank or a high-wattage appliance (like a 1,500W space heater) is recommended for testing under load conditions. Always wear insulated gloves and safety glasses when working near live components.
- Digital Multimeter – Must have true RMS capability for accurate AC readings.
- Non-Contact Voltage Tester – Confirm power is off before touching terminals.
- Load Device – Space heater or toaster to simulate electrical draw.
- Screwdriver Set – For removing regulator covers and accessing brushes.
- Wire Brush – To clean slip rings if carbon build-up is suspected.
How Do I Perform a Voltage Regulator Test on My RV Generator?
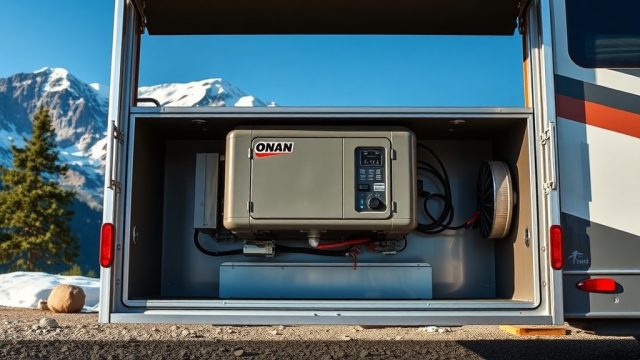
Begin by locating the voltage regulator. On most RV generators (e.g., Onan, Generac, Honda), it is mounted on the side of the generator end or inside the control box. Disconnect the generator from any loads and remove the negative battery cable to prevent accidental injury. Set your multimeter to AC voltage (200V range) and start the generator. Allow it to warm up for 2-3 minutes.
Place the multimeter probes across the main AC output terminals (usually marked L1 and L2 or Line and Neutral). A healthy generator should read between 115V and 125V with no load. If the voltage is below 110V or above 130V, the regulator is suspect. Next, test under load: plug in a 1,500W heater. The voltage should drop no more than 5-7 volts under load. A drop of 10V or more indicates a weak regulator or failing alternator.
For brush-type generators, check the brushes for wear. Remove the brush holder and inspect carbon length. If less than 1/4 inch, replace them. Clean the slip rings with the wire brush if they appear black or glazed. If the voltage is stable but low, the regulator may need adjustment. Some models have a potentiometer to tweak voltage output—refer to your manual for exact procedure.
If your generator is propane-powered, you may need to adjust fuel mixture as well. See our guide on RV Generator Propane Conversion Kit Installation: Step-by-Step Guide for details on how fuel type affects voltage regulation.
What Are the Common Voltage Regulator Problems and Their Severity?
Voltage regulators fail in several ways, each with a different impact on your generator’s performance. Below is a table outlining the most common issues, their severity, symptoms, and approximate repair costs in Great British Pounds (£).
| Issue | Severity | Symptoms | Estimated Repair Cost (£) |
|---|---|---|---|
| Worn Brushes | Moderate | Low voltage under load, sparking at slip rings | £20 – £50 (parts) |
| Carbon Tracking on Slip Rings | Moderate | Erratic voltage, generator hard to start | £0 – £10 (cleaning cost) |
| Failed Solid-State Regulator Module | High | No output, over-voltage, generator shuts down | £80 – £200 (module replacement) |
| Open or Short Circuit in Field Winding | Critical | Zero voltage at output, generator runs but no power | £150 – £400 (rewind or replace) |
| Loose or Corroded Connections | Low | Intermittent voltage loss | £0 – £5 (cleaning and tightening) |
If you encounter a critical issue like an open field winding, professional repair may be necessary. However, simple brush replacement or cleaning can be done by any handy RV owner. For those with inverter generators, the regulator is often integrated into the inverter board. See our article on RV Generator Inverter Maintenance: Simple Steps to Extend Its Life for specific inverter regulator tips.
How Can I Adjust the Voltage Regulator on My RV Generator?
Some RV generators feature a voltage adjustment pot (potentiometer) located on the regulator board. This is typically a small screw or dial you can turn with a flathead screwdriver. Before adjusting, you must confirm that your regulator allows manual adjustment—not all models do. Refer to your generator’s service manual. If it does, proceed with the generator running at no load.
Attach your multimeter to the output terminals. Slowly turn the adjustment screw clockwise to increase voltage, counterclockwise to decrease. Make small adjustments (1/8 turn at a time) and allow the voltage to stabilise for 30 seconds. Aim for a no-load voltage of 120V to 125V. Do not exceed 130V, as this can damage appliances. After adjusting, test under load to ensure the voltage stays above 115V.
If you cannot adjust the voltage to the correct range, the regulator may be defective and need replacement. In some cases, poor fuel quality can cause voltage instability. Check out RV Generator Ethanol-Free Fuel Guide: Benefits and Sourcing Tips to see how ethanol in fuel can affect generator performance.
What Owners Say About RV Generator Voltage Regulator Repairs
Many RV owners share similar experiences when dealing with voltage regulator issues. John from Cumbria reported: “My 4kW Onan generator started dropping voltage under load to 95V. Replaced the brushes and cleaned the slip rings, and it’s back to 120V steady. Cost me £25 and an hour of work.” Sarah, a full-timer, says: “My portable generator’s regulator went out completely. I replaced the entire module for £120. It was a bit fiddly, but the tutorial online helped. Now I run my air conditioner without issues.”
Another common theme is that ethanol-free fuel significantly reduces regulator problems. Mark from Scotland notes: “After switching to ethanol-free fuel, my generator runs smoother and the voltage is more stable. The regulator still needed adjustment once, but it’s been rock solid since.” Many owners recommend checking the voltage regulator as part of routine maintenance, especially before long trips. They advise that a simple test can prevent more expensive repairs down the road.