Why Does My RV Generator Need a Throttle Body Cleaning?
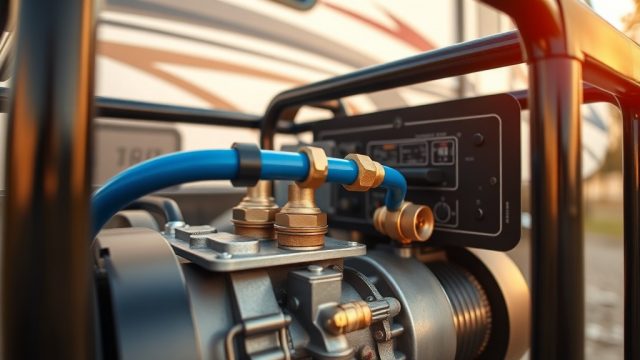
An RV generator’s throttle body controls the amount of air entering the engine, mixing it with fuel for combustion. Over time, carbon deposits, varnish, and dirt accumulate on the throttle plate and bore, disrupting this air-fuel ratio. This leads to rough idling, surging under load, reduced power output, and even hard starting—especially in older units or those run on ethanol-blended fuels. A thorough cleaning restores proper airflow, stabilizes idle, and prevents expensive repairs. Many RV owners overlook this service, but it’s one of the most cost-effective maintenance tasks you can perform, often costing less than £25 (approximately AUD 45) for cleaner and tools.
Dirty throttle bodies are a common culprit behind generator failure to start or maintain load. If your generator stumbles when you turn on the air conditioner or shows erratic RPMs, a cleaning should be your first diagnostic step before considering a trip to a service centre. Regular cleaning every 300–400 running hours or annually (whichever comes first) keeps the unit breathing freely.
What Tools and Materials Do I Need for Throttle Body Cleaning?
Before starting, gather the correct supplies. Using the wrong cleaner can damage throttle body seals or sensors, so stick to a dedicated throttle body cleaner—not carburetor cleaner or brake parts cleaner, which are too aggressive. You will need:
- Throttle body cleaner spray (specifically for throttle bodies, safe for sensors and seals) — about £12–15 (AUD 22–27)
- Clean lint-free microfiber cloths or shop towels
- Soft-bristle brush (old toothbrush works well) or a dedicated throttle body cleaning brush
- Flathead screwdriver and socket set (typically 8mm, 10mm, and 13mm sockets) for removing the air intake tube and throttle body if needed
- Nitrile gloves and safety glasses
- Shop vacuum or compressed air to clean debris around the intake area before disassembly
- Torque wrench (if removing throttle body completely) — value around AUD 80 for a decent 3/8‑inch drive model
Many RV generators, especially Onan models, have the throttle body integrated into the carburetor assembly. In such cases, partial cleaning without full removal is possible, but complete removal gives far better results. If you plan to do this regularly, consider investing in a RV Generator Inverter Installation: Step-by-Step Guide for Clean Power for your unit—clean power starts with a clean air path.
The total material cost for a single cleaning runs under £20 (AUD 36) if you already own basic tools. A professional shop would charge £80–150 (AUD 145–270) for the same service.
How Do I Safely Access and Remove the Throttle Body?
Safety is paramount when working on an RV generator. Begin by disconnecting the negative battery terminal to prevent accidental starting. Also, turn off propane or diesel supply if your generator uses those fuels. Let the generator cool completely—exhaust and engine components become extremely hot.
Follow these steps to access the throttle body:
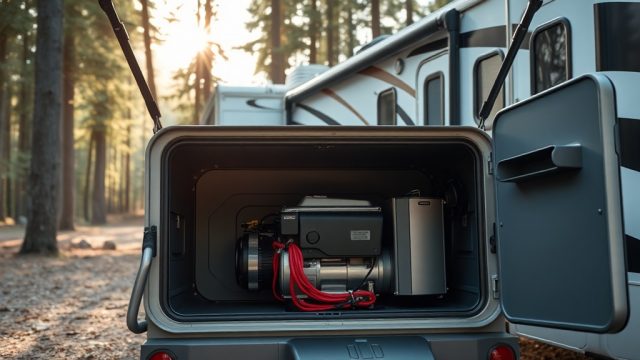
- Remove the generator service door and locate the air cleaner assembly. It is usually a cylindrical canister or rectangular box connected to the carburetor via a flexible rubber hose.
- Unscrew the air cleaner cover and lift out the element. Inspect it—if it’s heavily soiled, replace it now (approximately £15 / AUD 27).
- Loosen the hose clamp securing the rubber intake boot to the throttle body using a flathead screwdriver or 8mm socket. Wiggle the boot free.
- If you have a modern inverter generator, you may need to disconnect the throttle position sensor (TPS) electrical connector. Note its orientation for reassembly.
- Using the appropriate socket, remove the two or three bolts holding the throttle body to the intake manifold. On some Onan models, these bolts are 10mm with a small shoulder.
- Carefully lift the throttle body away. Note the gasket between it and the manifold—if it tears, you must replace it (cost about £5–8 / AUD 9–14).
Once removed, place the throttle body on a clean workbench. Take a photo with your phone to document wire routing and orientation. This is especially useful if your unit is an older model where parts are not symmetrical.
If you’re planning to upgrade your generator’s starting convenience, consider reading our RV Generator Remote Start Installation: Step-by-Step Guide for Convenience after completing this cleaning.
What Is the Correct Technique for Cleaning the Throttle Body?
Cleaning the throttle body incorrectly can cause damage. The goal is to remove deposits without scratching delicate surfaces or getting cleaner into sensitive electronics. Here is the proper method:
- Spray a generous amount of throttle body cleaner onto a clean cloth—never spray directly into the throttle body while it is on the generator, as fluid can enter the intake manifold.
- With the throttle plate closed, wipe the bore and the plate itself. Use a soft brush or toothbrush to loosen stubborn carbon deposits, especially around the plate edges and the idle air bypass port.
- Manually open the throttle plate using a screwdriver handle (avoid metal tools that can score surfaces) and clean the back side of the plate and the bore area it contacts when fully open.
- If your generator has an idle air control (IAC) valve passage, clean that port carefully—clogged IAC passages cause hunting idle. Use a small brush or a blast of cleaner from the aerosol can’s straw.
- Wipe all surfaces dry with a clean cloth. Do not leave pooled cleaner inside the throttle body.
- Inspect the throttle body gasket surface. Remount using a new gasket if the old one is compressed or distorted.
Avoid using any abrasive pad or steel wool. The throttle bore often has a special anti-friction coating that can be removed by abrasion, leading to future sticking issues. If your throttle body has an integrated sensor, do not immerse it in cleaner—wipe it gently.
For generators that see high-altitude operation, the throttle body may accumulate different types of deposits due to richer fuel mixtures. If you frequently camp above 2,500 metres, check our RV Generator Altitude Performance: Tuning and Adjustments for High Elevations for complementary tuning tips.
How Do I Reinstall and Test the Generator After Cleaning?
Reassembly is the reverse of removal, but a few critical checks ensure success:
- Install a fresh gasket on the intake manifold. Do not use any sealant—throttle body gaskets are designed to seal dry.
- Position the throttle body and torque the mounting bolts evenly to manufacturer specification, typically 8–10 Nm (6–7 ft-lb). Over-tightening can warp the housing.
- Reattach the rubber intake boot and tighten the clamp securely. Ensure the air filter element is clean and properly seated.
- Reconnect any electrical connectors (TPS or IAC). Verify they click fully.
- Reconnect the battery negative terminal.
- Start the generator without any load applied. Let it idle for 2–3 minutes. The idle should stabilise quickly. If it hunts, check for vacuum leaks at the intake boot or gasket.
- Apply a small load (one appliance, e.g., a 1,000W microwave). The engine should take the load smoothly without surging.
- Run the generator for at least 15 minutes under moderate load to burn off any cleaner residue that may have entered the cylinders.
If you notice erratic behaviour still, the problem may lie deeper—in the fuel system or ignition. A clean throttle body often reveals other issues. Combine this task with fresh fuel and a new fuel filter. For best results, pair the cleaning with a RV Generator Ethanol-Free Fuel Guide: Benefits and Sourcing Tips—cleaner fuel means cleaner throttle bodies over time.
What Are the Most Common Throttle Body Problems on RV Generators?
Some issues appear repeatedly in RV generator throttle body service. Understanding them helps you diagnose even before you open the compartment.
| Symptom | Probable Throttle Body Cause | Severity | Estimated Repair Cost (AUD) |
|---|---|---|---|
| Rough idle, stalling on startup | Carbon buildup on throttle plate and idle port | Medium | £0 (DIY cleaning) – £50 (professional cleaning) |
| Engine surges under load (A/C kicking on) | Sticky throttle plate or dirty IAC passage | High | £15 (cleaner) – £150 (replacement throttle body) |
| No response to throttle increase | Throttle plate stuck in partially closed position | High | £25 (cleaning) – £200 (new unit) |
| Check engine light on (if equipped) | TPS sensor affected by carbon debris or loosened by vibration | Medium | £45 (TPS replacement) + cleaning |
| Fuel smell in exhaust, poor fuel economy | Rich running due to restricted air path causing overfueling | Medium | £15 (cleaning) – £80 (carburetor kit) |
If you’re converting your generator to run on propane, note that propane burns cleaner than petrol but still leaves slight carbon deposits. You can reduce the frequency of cleaning by using a propane conversion. Read our RV Generator Propane Conversion Kit Installation: Step-by-Step Guide for details on that upgrade.
What Owners Say About Throttle Body Cleaning
Experienced RV owners consistently report noticeable improvements after a throttle body cleaning. On forums and discussion groups, the feedback is practical and direct:
- “My Onan 4000 would barely start after a week of storage. Cleaned the throttle body plate with a toothbrush and starter fluid—fired right up and idled smooth. Cost me nothing but 20 minutes.” — James L., Queensland
- “I was ready to replace my generator until I watched a video on cleaning. The throttle bore was covered in black gunk. After cleaning, it runs like new. Saved me AUD 800.” — Sandra T., Victoria
- “Important caveat: don’t spray cleaner into the intake while the generator is running. I did that and hydraulic locked the engine. Had to remove spark plugs. Learn from my mistake.” — Mark R., New South Wales
- “I do this every 200 hours now, as preventive maintenance. The biggest improvement was getting my Microlite 2800 to hold steady power for the rooftop AC. It used to hunt badly.” — Cathy D., Florida
- “Combined this cleaning with the RV Generator Inverter Maintenance: Simple Steps to Extend Its Life guide—my inverter generator now stays cool and runs consistently at altitude.” — Tony G., Colorado
The consensus: throttle body cleaning is one of the most accessible DIY tasks for RV generator owners, with a near-100% success rate for resolving rough running issues when done correctly. Many who have done it once continue it as a regular habit.
Frequently Asked Questions
1. How often should I clean my RV generator throttle body?
Clean the throttle body every 300–400 running hours, or once per year if you use the generator regularly. If you run the generator infrequently but store it with ethanol fuel, clean it every six months because ethanol attracts moisture and leaves varnish that accelerates deposits.
2. Can I use carburetor cleaner instead of throttle body cleaner?
No. Carburetor cleaner is more aggressive and can damage the protective anti-friction coating inside the throttle bore, as well as deteriorate seals and sensor components. Always use a cleaner specifically labelled “throttle body safe” or “for throttle bodies.”
3. Do I need to remove the throttle body completely for effective cleaning?
Not always, but removal gives the best results. You can clean the throttle plate and bore in place if the manufacturer allows access. However, complete removal lets you clean the back side of the plate and the idle air bypass ports thoroughly. It also lets you inspect the gasket for leaks.
4. Will cleaning fix a surging generator under load?
It often does. Surging under load is frequently caused by a dirty throttle body that cannot maintain proper air flow when additional demand is placed on the engine. If cleaning does not resolve the surge, check the fuel filter, spark plugs, and governor adjustment.
5. What if my throttle body has a closed PCV system—do I need to clean that too?
Yes. A PCV valve that vents oil vapours back into the intake will deposit oil residue on the throttle plate. While cleaning the throttle body, inspect and replace the PCV valve if it is stuck open or closed. Typical PCV valve cost is about AUD 12 (around £7).
6. Can I do this cleaning while the generator is still installed in the RV?
Yes, you can. Many generators have enough access through the side service door to remove the air filter, intake tube, and even the throttle body without pulling the unit out. However, working in a cramped compartment may be difficult. If you need more room, consider removing the generator entirely, but that adds complexity.